Tuesday, December 4, 2012

Happy December Daily!

                                       
How many of you have heard of December Daily? If you haven't, it's an album concept created by Ali Edwards (www.aliedwards.com) to document your Christmas season. Over the last few years, her idea has spread, and people all over the world are now recording their memories in December. The best part of December Daily? It can be WHATEVER you want it to be. You can make it a journal. You can make a layout (or several layouts). You can make a minibook. You can make a special Christmas album. You can just take a picture. Or write a blog post. Whatever YOU want. It's all up to you.

I decided this year to use a Simple Stories Sn@p album as my base. This is a 6x8 album with various sized page protectors. Some pages fit 2 4x6 photos. Some fit 4x4 (PERFECT for We Instagram Lovers out there!). Some are 2x8. And some are 3x4. The album also includes some chipboard pages, as well as some patterned cardstock pages, to add variety to your project. Refill pages are available in all the different configurations, so you can customize your album however you like. There are some left in the store, but if they're out by the time you get there, it's still ok. Pick an album you like. 6x6 albums are great for taking a 6x6 paperpad and just slipping the papers into the page protectors. Or cut a 12x12 paper into 4 squares and slip them in. Embellish as desired, and you've got your album prepped pretty quickly! Or choose one of the awesome acrylic albums ScrapHappy has in stock! Play with inks. Play with paint. Learn a new technique. Or keep it simple. Whatever YOU want!

Over Thanksgiving, I prepped my album. I used an 8x8 patterned paper pad from October Afternoon and cut all the papers apart to set up my base pages. I also precut and inked some white cardstock cards in the various pocket sizes to use for my journalling. Now all I have to do during December is to take pictures, print them, stick them in my album, and write some quick journalling (if I feel like it). I can embellish each day if I want to, but if I don't, then it's still All Good. My Christmas is being recorded.

I know it's already December 4, but it's not too late to start a December Daily project of your own. Drop by the store. Pick out an album and some special Christmas paper (And YES! The Christmas paper has arrived at ScrapHappy! Echo Park! Fancy Pants! And More!) . Turn on 25 Days of Christmas, and cut and prep your way to making your holiday even more special. And if you want to see the rest of my December Daily pages as the month progresses, follow me on Instagram: cdpeck. I'll be uploading my pages on an almost-daily basis (I'm aiming for daily, but Life does get in the way sometimes...).

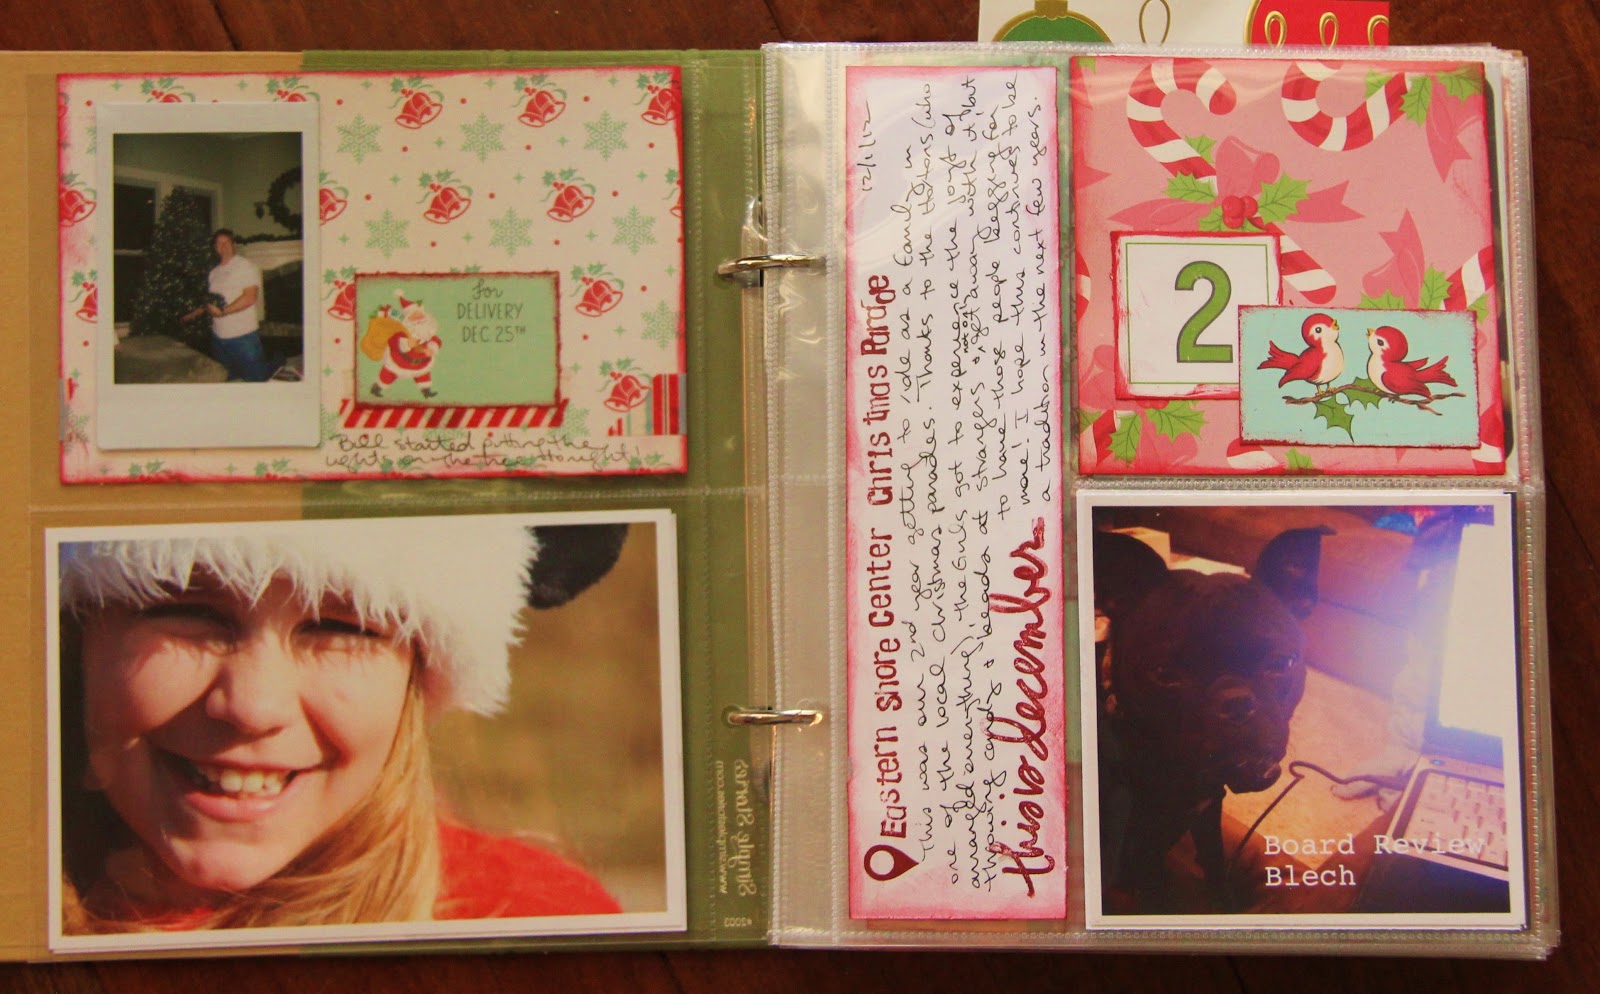
And now, without further ado, my December Daily: First up, my completed pages for December 1-3:


And here's a sample of the pages still to come, with my prep work complete:

Supplies:
Album - Simple Stories
Patterned Paper and Washi Tape - October Afternoon
Thickers - American Crafts
Stamps - Technique Tuesday, Stampin' Up!, Kelly Purkey
Ink - Stampin' Up!
Wood Veneers - Studio Calico
Embossing Powder

Monday, November 26, 2012

Using the B Side

Hello, World!
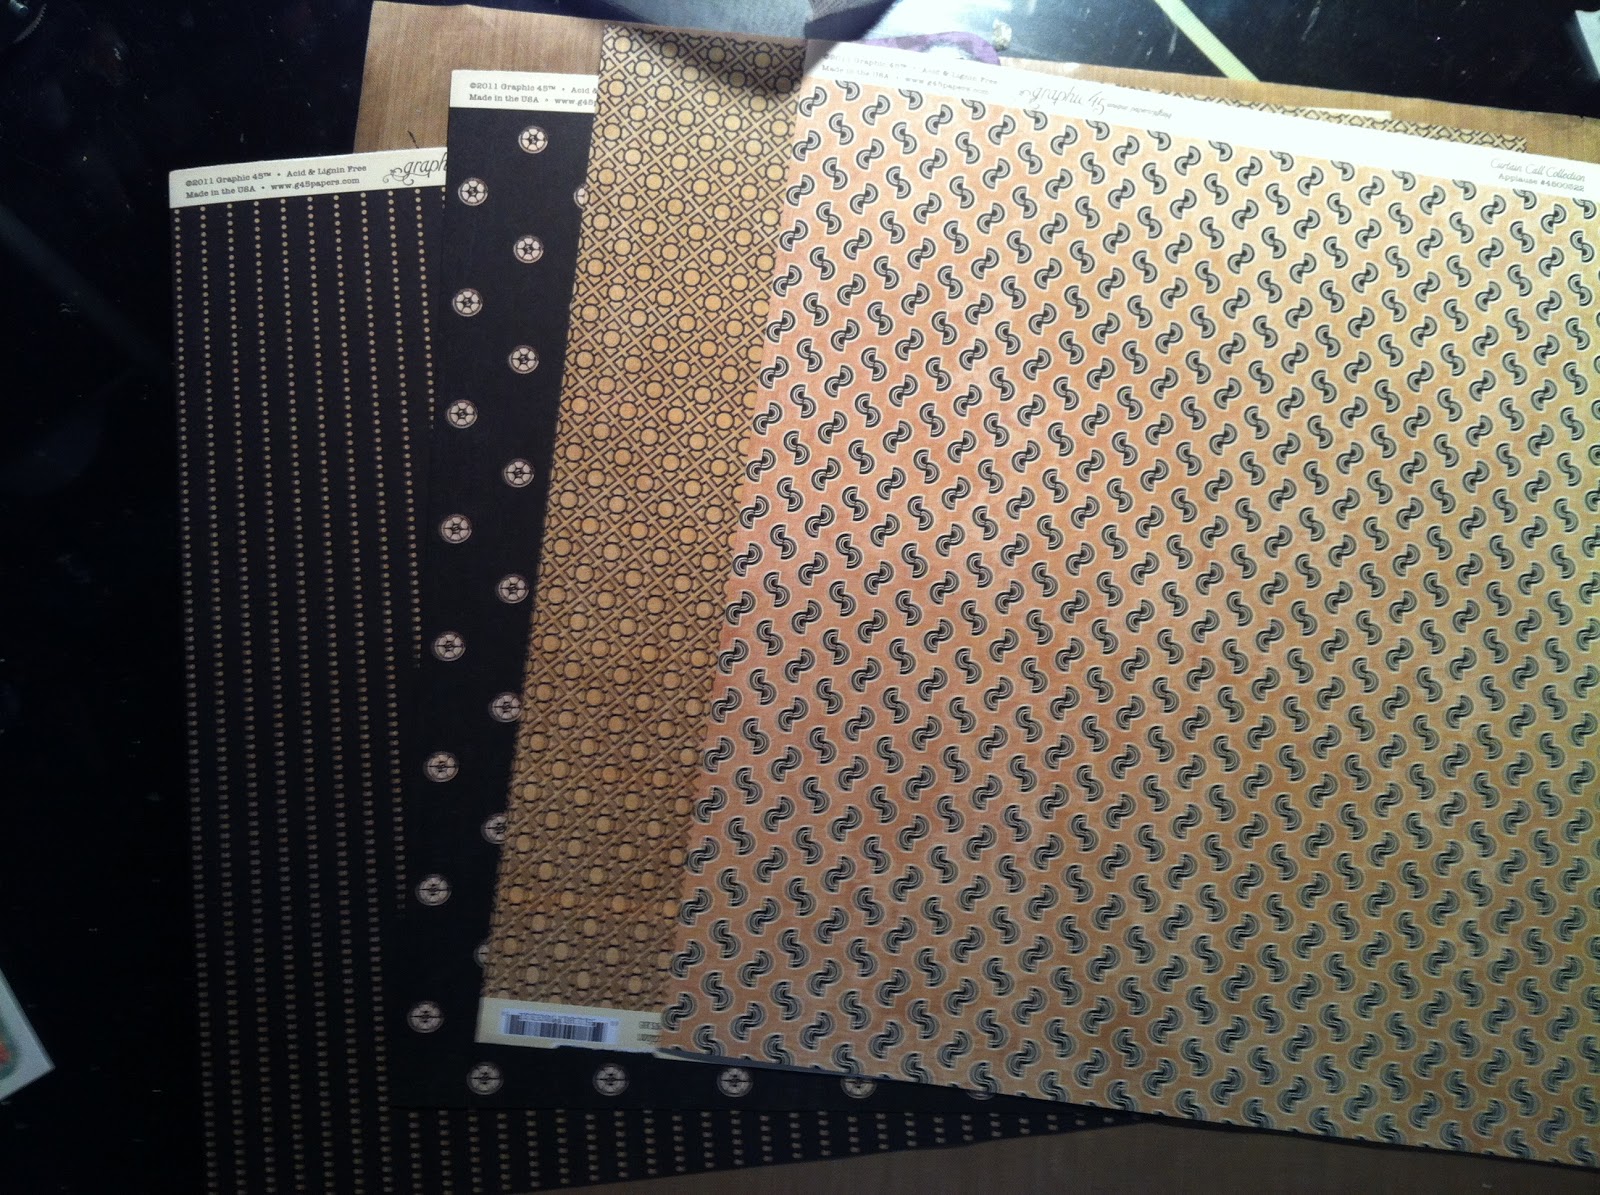
I hope you all had a wonderful Thanksgiving weekend, and I hope you all had some time to play with your scrappy supplies and toys! Christy asked me to use these Graphic45 papers this month, and sadly (for me), they were a little too 'busy' for the pictures I had printed to scrap.

So what do you do when your patterned paper isn't exactly what you had in mind? Flip them over. Many manufacturers these days are printing their papers double-sided: a bold, larger focal point on the front, and a smaller, more subtle, coordinating pattern on the back. These 'B-sides' often make perfect backgrounds and embellishments when used as bits and pieces.
And now, without further ado... this month's layouts, using these papers as both backgrounds and as embellishments. Enjoy!

 Supplies:
- patterned paper - Graphic45, Scenic Route

- cardstock - Bazzill
- washi tape
- die cutter - Silhouette
- punches - EK Success
- decorative brads
- letter stickers - Prima, American Crafts, Cosmo Cricket Tiny Type
- metal embellishments - Making Memories (old - from my stash)
- spray ink


Tuesday, October 2, 2012

Using Up Your Leftovers

When you scrapbook, what do you do with your leftovers? Do you put them away? Do you slide them to the side of your desk to think about later? Do you add them to a pile? Or even better, do you actually use those little bits and pieces? If you were to see my desk, you would know that I am an infrequent scrap cleaner. I tend to push my leftovers into a pile and stack them up until I can't stand it anymore and decide to do something with them. Often, this means that I will compile these pieces into layouts and combinations I never would have planned for if I had thought ahead. So what do I do? I go to Scraphappy, pick up 2 or 3 pieces of patterned paper, some letter stickers (especially Thickers...I am on a serious Thickers kick lately), and combine that with what's on my desk to make some layouts. And the Bonus? My desk gets cleaned off without any effort!

For my first layout, I used Studio Calico and Lilly Bee papers that I already had, combined with the teal thickers and butterflies that I got at Scraphappy. The leftovers? The Amy Tangerine stickers and teal woodgrain washi tape.

This next layout uses some new Shoreline papers as a background, combined with leftover Amy Tangerine stickers, an Amy Tangerine pocket, Shoreline sunburst scraps, and Heidi Swapp banner pieces cut off from a previous project. The hexagons are from a Studio Calico stamp set and are attached with some brads I found in my drawer.


The only new item on this final layout is the background paper and the teal letter 'P.' Everything else on this page was leftover. The light blue strip of Shoreline with the hot pink splatters? Leftover from the Baby Turtles layout. The My Mind's Eye transparency? Scavenged from my Valentine's Day memo board. The Heidi Swapp disco heart? The last of a package from this past spring.


So what have we learned today? Use your stash! Use those bits and pieces of scraps. Use pieces from different manufacturers and product lines to make your own combos. Need some patterned papers, letters, or cardstock to pull it all together? Head on in to Scraphappy and buy what you need! It's all there!

Tuesday, September 4, 2012

End of Summer with Shoreline

Hello World!

How was your summer? Any days at the beach? Any fun travel? Any good family time? Any time to play? And now the important question...Any time to scrap? The last time I was in the store, Christy gave me some of American Crafts' Shoreline papers to play with, and WOW, they are perfect for bright, happy summer events (or anything else bright and happy you may want to use them for). The colors are uber-saturated reds, blues, and yellows with some dark hot pinks and pool blues to accent. I have had the most fun scrapping with these papers, hoarding every little bit and piece to tuck here and there as color bursts on other projects.

I was blessed this summer with the opportunity to go with my father on a medical mission trip to Peru. At the end of the trip, we spent a day touring Machu Picchu. The Shoreline bright yellow sunburst pattern screamed 'Incas' to me, so I used it as the background for this layout about how much we climbed that day. I used some old kokopelli stamps I had in my stash to stamp on some canvas in teal, then stamped the words in black over the person kokopelli. I added some Mini Market letters from October Afternoon and some brads to finish off the page.
This next layout is about a shopping excursion I took with my daughter last month. We were separately scavenging a clothing store for clothes to try on. When we met up in the dressing room, we had both picked the same dress! Obviously, as a scrapbooking mom, this had to be documented on my cell phone so a layout could be made. If you look at the layout, and think about my typical style, you'll notice that I am a B-side scrapper. I prefer the backsides to most patterned papers. They tend to be more subtle, less busy patterns that recede into the background more than their typical trendier, bolder A-sides. This shopping layout uses almost all B-sides.
And then we come to my last layout for today. I made the background of this layout by spraying various colors of yellow and green spray mist onto shiny white cardstock then blending them with a paper towel. The sunshine embellishments were cut out from a separate sheet of Shoreline paper, as was the strip at the bottom and the 'sunshine' label.
I hope you've been inspired to pull out your summer pictures and spend some time creating. If you want any of the Shoreline papers, go see ScrapHappy and stock up! I think I might be needing some more for my own stash...Maybe I'll see you there?

Supplies:
- American Crafts - patterned paper, Thickers
- letter stickers - October Afternoon, Lily Bee Studios
- spray mists - Studio Calico, October Afternoon, Tattered Angels
- disco starts - Heidi Swapp
- wood veneer stars and camera - Studio Calico
- chipboard stars, brads, teal stamping ink, canvas fabric

Sunday, August 12, 2012

Heidi Swapp Memory Files and Color Magic

Hello World!
How many of you have seen Heidi Swapp's file folders and thought, "What am I supposed to do with that?" I know I did, so this past spring when Heidi taught a 12 week online Memory File class, I signed up to learn straight from the master. Depending on your mood, you can choose from her patterned paper files that coordinate with her paper lines or her DIY Color Magic Files. For today's project, I used Color Magic. I love that I can make these papers whatever color I want. Each Color Magic item has a trendy resist pattern on a white background. I wanted a bright, happy, yellow and green background to coordinate with the Vacation Bible School (VBS) embellishments and some American Crafts Shoreline papers, so I gathered my yellow, green, and teal spray inks and happily sprayed my blank file (You can use any ink or paint you want. The choice is completely yours). After spraying, I used paper towels to wipe off the excess ink and reveal the chevron resist pattern. Being the ink snob that I am, and given my refusal to waste any of my precious spray ink, I used the excess ink on my paper towel (baby wipes work well for this, too), and rubbed the ink onto the inside of the file to colorize the inside.
Memory Files are designed for those moments and times where you want to scrapbook 20-30 (or more pictures), but you really don't want to make 3 or 4 (or more) layouts all on the same topic.With a Memory File, all those pictures and embellishments can all fit in one 'layout.' If you read Heidi's blog or get to take a class with her, she teaches various methods of incorporating more photos into your file. For this file, I used a baseball card page protector and some orange washi tape to add an extra 'page' to my Memory File. I then added my patterned papers and phots, and then embellished as usual. I plan to add more photos to the page protector, but I have to collect the photos from my friends first ;)
This year's VBS theme was Amazing Wonder's Aviation and focused on flight and the Wonders of the World. I used Studio Calico wood veneers to highlight the travel focus and to tie my layout into the VBS ephemera I want to incorporate into my Memory File.

I hope I've helped you learn how to get more photos into one project. There are sooo many ways to use a Memory File in your scrapbooking life. If you want to learn more, please leave a comment, or tell Christy that you want us to teach a special Memory File class in the store.

- Cori

Supplies:
- Heidi Swapp - Color Magic Memory File
- Studio Calico - Mister Huey's spray inks, wood veneers
- American Crafts - patterned paper, rub-ons
- brads, washi tape, baseball card page protector
- VBS ephemera

Tuesday, August 7, 2012

Using Themed Products in a Non-Themey Way

Hello World!

Another month, another blog post from me! Or 2 or 3, as the case may be this month, since I found myself with an abundance of layouts I have made this summer for Christy that I have not yet shared with you ;) Today we are going to talk about using those cute themey supplies for uses that have NOTHING to do with the theme. Sacriledge, right? I know. I know. We buy the cute themed supplies BECAUSE they fit the theme we want to work with. But what do we do with the leftovers after we have scrapped the theme??? We use them anyway!

How many of you have actually scrapped your July 4 pictures from this year? And how many of you have leftover 'July 4'-specific supplies left? Or you just love the red, white, and blue combo and want to use it over and over again? Today's layouts feature some Pebbles July 4 papers that I found at ScrapHappy but decided to use for several non-holiday pages. Honestly, I haven't even printed my July 4 pictures yet, but I knew I wanted to use the papers NOW, so I used photos I already had printed.

The first layout actually doesn't even have pictures at all. Many of you know my family went on a Great American Road Trip last summer. One entire month of seeing our beautiful country. Since then, I've been scrapbooking our trip. I have already filled an entire album (I file all my pages chronologically. I scrap whatever inspires me on any given day, but then I put them in albums by date), so I decided I needed an official Title Page to separate this section of layouts from the rest of my pages. I've been pondering a Title Page for months, and when I saw this United States map paper, I knew I had found the perfect background. Since this is a 'busy' paper, with lots of graphics that I wanted to use, I opted to focus on the map and not use photos at all. Instead, I put brads and star stickers on the locations we focused our trip around and connected them with string. Next to each brad, I wrote the location and sight seen there (ex. Mt. Rushmore in Rapid City, South Dakota). I inked and glued the bar code strips from the collection as my accent papers, and used Studio Calico wood veneers to indicate our family and method of travel.


This next layout features the entire Pledge of Allegiance. I didn't want to obscure the words, but I still wanted to use the paper for a traditional layout. I used a small Instax photo I took of my Niecelets together in Tennessee and added small embellishments on the diagonal. I wanted to emphasize certain words in the Pledge, so I highlighted them with Stickles. I'm not sure I'm thrilled with the results, but I wanted you to know why part of the layout sparkles and why part of it doesn't. Lol.

My final layout for today uses some of my favorite Disney pictures from this past Spring Break. We were fortunate to be there when the 'new' Dumbo in the Fantasyland expansion had just opened. My Girls rode late at night (no lines then) while I took pictures. When I saw the photos on my desk next to these Pebbles papers, I knew they were made for each other.
I hope I've given you some ideas on how to use your holiday papers for non-holiday layouts. From photoless pages, to tiny pictures, to Disney, I hope these inspire you to pull out some of your leftover supplies (or go buy more supplies!) and make pages to be proud of.

- Cori

Supplies:
- patterned paper - Pebbles
- cardstock - Bazzill
- letter stickers - October Afternoon, Jenni Bowlin Studios
- wood veneers - Studio Calico
- transparency - Hambly
- Disco Stars and Instaframe - Heidi Swapp
- shaped paper clips - Amy Tangerine
- Distress Ink
- number stencil, brads, thread, white Uniball journalling pen

Tuesday, July 3, 2012

Amy Tangerine Day Books

Greetings!
Today I want to show you a great product Christy recently got in the store: Day Books. These are pre-made mini-books (by Amy Tan(gerine) for American Crafts) that are perfect for highlighting a single event or topic. Since I just learned how to print Instagram photos straight from my phone, I decided to use my Day Book to focus on all these pictures I've been printing lately.

First up, the cover: All Day Book covers come with an overlying transparency layer, perfect for decorating and adding a title. I used some letter stickers, Amy Tangerine Sketchbook tabs and stickers, and a wood veneer from Studio Calico (items which I repeated throughout the book to add to my book's cohesiveness).

Inside, the page sizes and shapes are varied for a fun, random look. If you have OCD tendencies (like me), then this can be hard to accept and work with, but consider it a challenge. Repeat your fonts, embellishments, and photo sizes, and that should give you the 'order' you crave (I used washi tape, Amy Tangerine labels, stickers, and envelopes, a package of Thickers, and more Studio Calico wood veneers). The pages are largely taken from her Sketchbook line, but there are other die-cut cardstock pages, envelopes, and ephemera added, as well. Below, you can see some of the pages in my book, which will be in the store for you to flip through and enjoy.


I hope you've enjoyed this month's project. As always, let me know if you have any questions, comments, or requests!