Tuesday, August 7, 2012

Using Themed Products in a Non-Themey Way

Hello World!

Another month, another blog post from me! Or 2 or 3, as the case may be this month, since I found myself with an abundance of layouts I have made this summer for Christy that I have not yet shared with you ;) Today we are going to talk about using those cute themey supplies for uses that have NOTHING to do with the theme. Sacriledge, right? I know. I know. We buy the cute themed supplies BECAUSE they fit the theme we want to work with. But what do we do with the leftovers after we have scrapped the theme??? We use them anyway!

How many of you have actually scrapped your July 4 pictures from this year? And how many of you have leftover 'July 4'-specific supplies left? Or you just love the red, white, and blue combo and want to use it over and over again? Today's layouts feature some Pebbles July 4 papers that I found at ScrapHappy but decided to use for several non-holiday pages. Honestly, I haven't even printed my July 4 pictures yet, but I knew I wanted to use the papers NOW, so I used photos I already had printed.

The first layout actually doesn't even have pictures at all. Many of you know my family went on a Great American Road Trip last summer. One entire month of seeing our beautiful country. Since then, I've been scrapbooking our trip. I have already filled an entire album (I file all my pages chronologically. I scrap whatever inspires me on any given day, but then I put them in albums by date), so I decided I needed an official Title Page to separate this section of layouts from the rest of my pages. I've been pondering a Title Page for months, and when I saw this United States map paper, I knew I had found the perfect background. Since this is a 'busy' paper, with lots of graphics that I wanted to use, I opted to focus on the map and not use photos at all. Instead, I put brads and star stickers on the locations we focused our trip around and connected them with string. Next to each brad, I wrote the location and sight seen there (ex. Mt. Rushmore in Rapid City, South Dakota). I inked and glued the bar code strips from the collection as my accent papers, and used Studio Calico wood veneers to indicate our family and method of travel.


This next layout features the entire Pledge of Allegiance. I didn't want to obscure the words, but I still wanted to use the paper for a traditional layout. I used a small Instax photo I took of my Niecelets together in Tennessee and added small embellishments on the diagonal. I wanted to emphasize certain words in the Pledge, so I highlighted them with Stickles. I'm not sure I'm thrilled with the results, but I wanted you to know why part of the layout sparkles and why part of it doesn't. Lol.

My final layout for today uses some of my favorite Disney pictures from this past Spring Break. We were fortunate to be there when the 'new' Dumbo in the Fantasyland expansion had just opened. My Girls rode late at night (no lines then) while I took pictures. When I saw the photos on my desk next to these Pebbles papers, I knew they were made for each other.
I hope I've given you some ideas on how to use your holiday papers for non-holiday layouts. From photoless pages, to tiny pictures, to Disney, I hope these inspire you to pull out some of your leftover supplies (or go buy more supplies!) and make pages to be proud of.

- Cori

Supplies:
- patterned paper - Pebbles
- cardstock - Bazzill
- letter stickers - October Afternoon, Jenni Bowlin Studios
- wood veneers - Studio Calico
- transparency - Hambly
- Disco Stars and Instaframe - Heidi Swapp
- shaped paper clips - Amy Tangerine
- Distress Ink
- number stencil, brads, thread, white Uniball journalling pen

Tuesday, July 3, 2012

Amy Tangerine Day Books

Greetings!
Today I want to show you a great product Christy recently got in the store: Day Books. These are pre-made mini-books (by Amy Tan(gerine) for American Crafts) that are perfect for highlighting a single event or topic. Since I just learned how to print Instagram photos straight from my phone, I decided to use my Day Book to focus on all these pictures I've been printing lately.

First up, the cover: All Day Book covers come with an overlying transparency layer, perfect for decorating and adding a title. I used some letter stickers, Amy Tangerine Sketchbook tabs and stickers, and a wood veneer from Studio Calico (items which I repeated throughout the book to add to my book's cohesiveness).

Inside, the page sizes and shapes are varied for a fun, random look. If you have OCD tendencies (like me), then this can be hard to accept and work with, but consider it a challenge. Repeat your fonts, embellishments, and photo sizes, and that should give you the 'order' you crave (I used washi tape, Amy Tangerine labels, stickers, and envelopes, a package of Thickers, and more Studio Calico wood veneers). The pages are largely taken from her Sketchbook line, but there are other die-cut cardstock pages, envelopes, and ephemera added, as well. Below, you can see some of the pages in my book, which will be in the store for you to flip through and enjoy.


I hope you've enjoyed this month's project. As always, let me know if you have any questions, comments, or requests!

Sunday, June 24, 2012

What Do I Do With That?

Hello, World!
You know those products that you see online or in the store that you absolutely LOVE and that you must have NOW?!! So you buy them. And then you get them home and think, "OK. This is awesome, but what do I do with it?" Well, these die-cut states from Studio Calico fit that description for me. I saw them at CHA and counted the days until ScrapHappy carried them. I'm a traveller. I'm a scrapbooker. You would think this would be easy, right? Sadly, it wasn't. I looked at them and pondered them for ages. I placed them on layouts (without adhesive, of course). I took them off those same layouts. I moved them around...and around...and around...and still they called to me. Until I had a serious BAM! moment, and I realized I didn't have to use them for layouts. I could use them all together as a map puzzle!
First, I had my Kid arrange them on cardstock (I still had hopes of making this a layout, but alas, they wouldn't all fit right on a 12x12 piece of cardstock). Then I decided to use a cork background and put my 'puzzle' in a frame - and you know what? It worked perfectly! After adhering the states to the cork, I added rhinestone stars to each state - bigger stars for where I've lived, and smaller stars for where I've visited. I then enclosed my puzzle background in the frame and added a title to the exterior of the glass with Thickers and Kaiser Craft letter stickers.


Thursday, June 7, 2012

DIY Smashbooks

Hello, Scraphappy Fans!

How many of you know what a 'Smashbook' is? It's this really cool premade album filled with patterned papers that you can take your pictures and everyday-bits-of-life (aka ephemera) and just 'smash' them (or glue them) into. You can make it as organized or random as you want. You can fill it from beginning-to-end. Or you can open to a random page and stick stuff in wherever it makes you happy. The only problem with a premade book like this is that you have no control over what the actual papers are. What you buy is what you get, so I'm going to show you how to make your own. Now you can pick the papers and patterns YOU want inside your book.

First step: Pick your papers. I chose the new summery, tropical-themed papers from Graphic45. Now I don't know about you, but I always think these papers are beautiful to look at, but when it comes to actually USING them, my mind goes blank. Fortunately for me (and now you, since I'm going to share), at CHA the Graphic45 people demo'd how to use their papers in a DIY Smashbook!
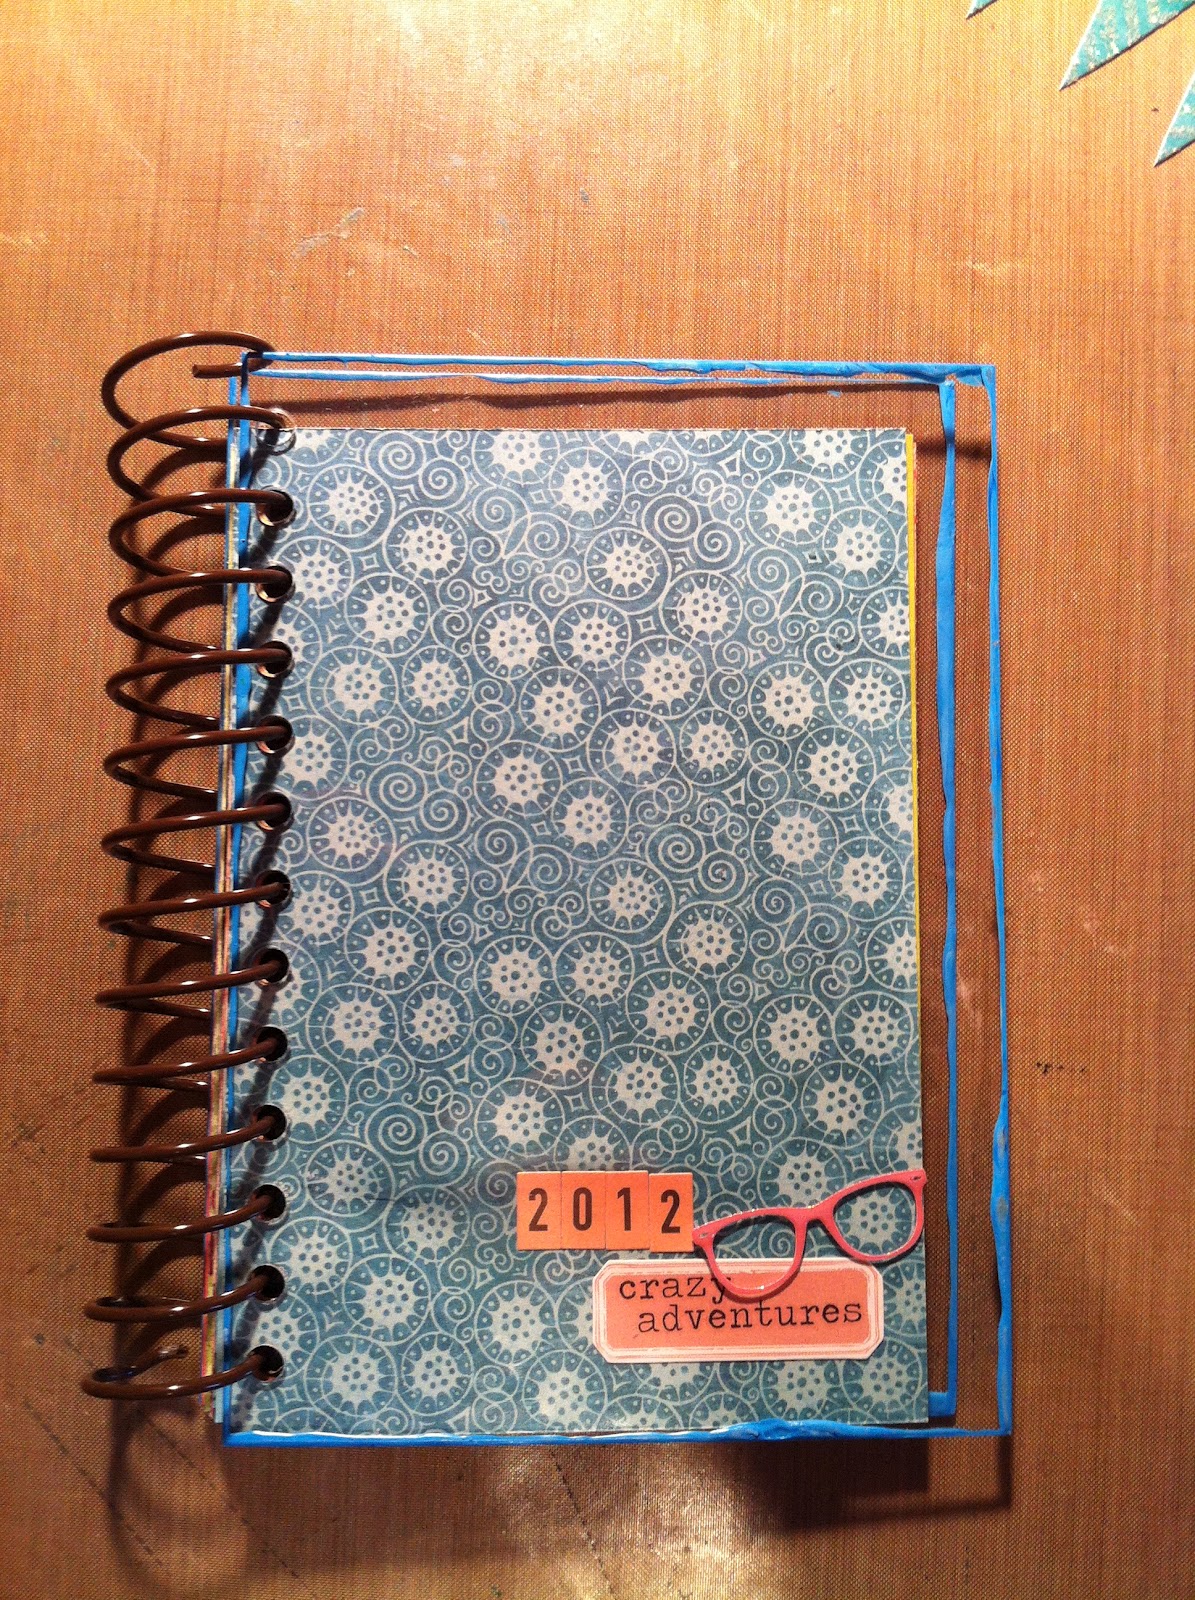
In the center of the previous photo, you can see some blue rectangles. Those are clear acrylic sheets that I decided to use for my covers. There's several sizes available at the store, and they are all quite inexpensive. To use the acrylic, just peal off the blue protective film and decorate however you choose. I wanted the edges of my cover to stand out, so I mixed some spray mist with white acrylic paint and painted the edges.
Next, I trimmed my papers to fit in my book. I used several sizes, including some pieces that I die-cut into scallops to add some fun variety.
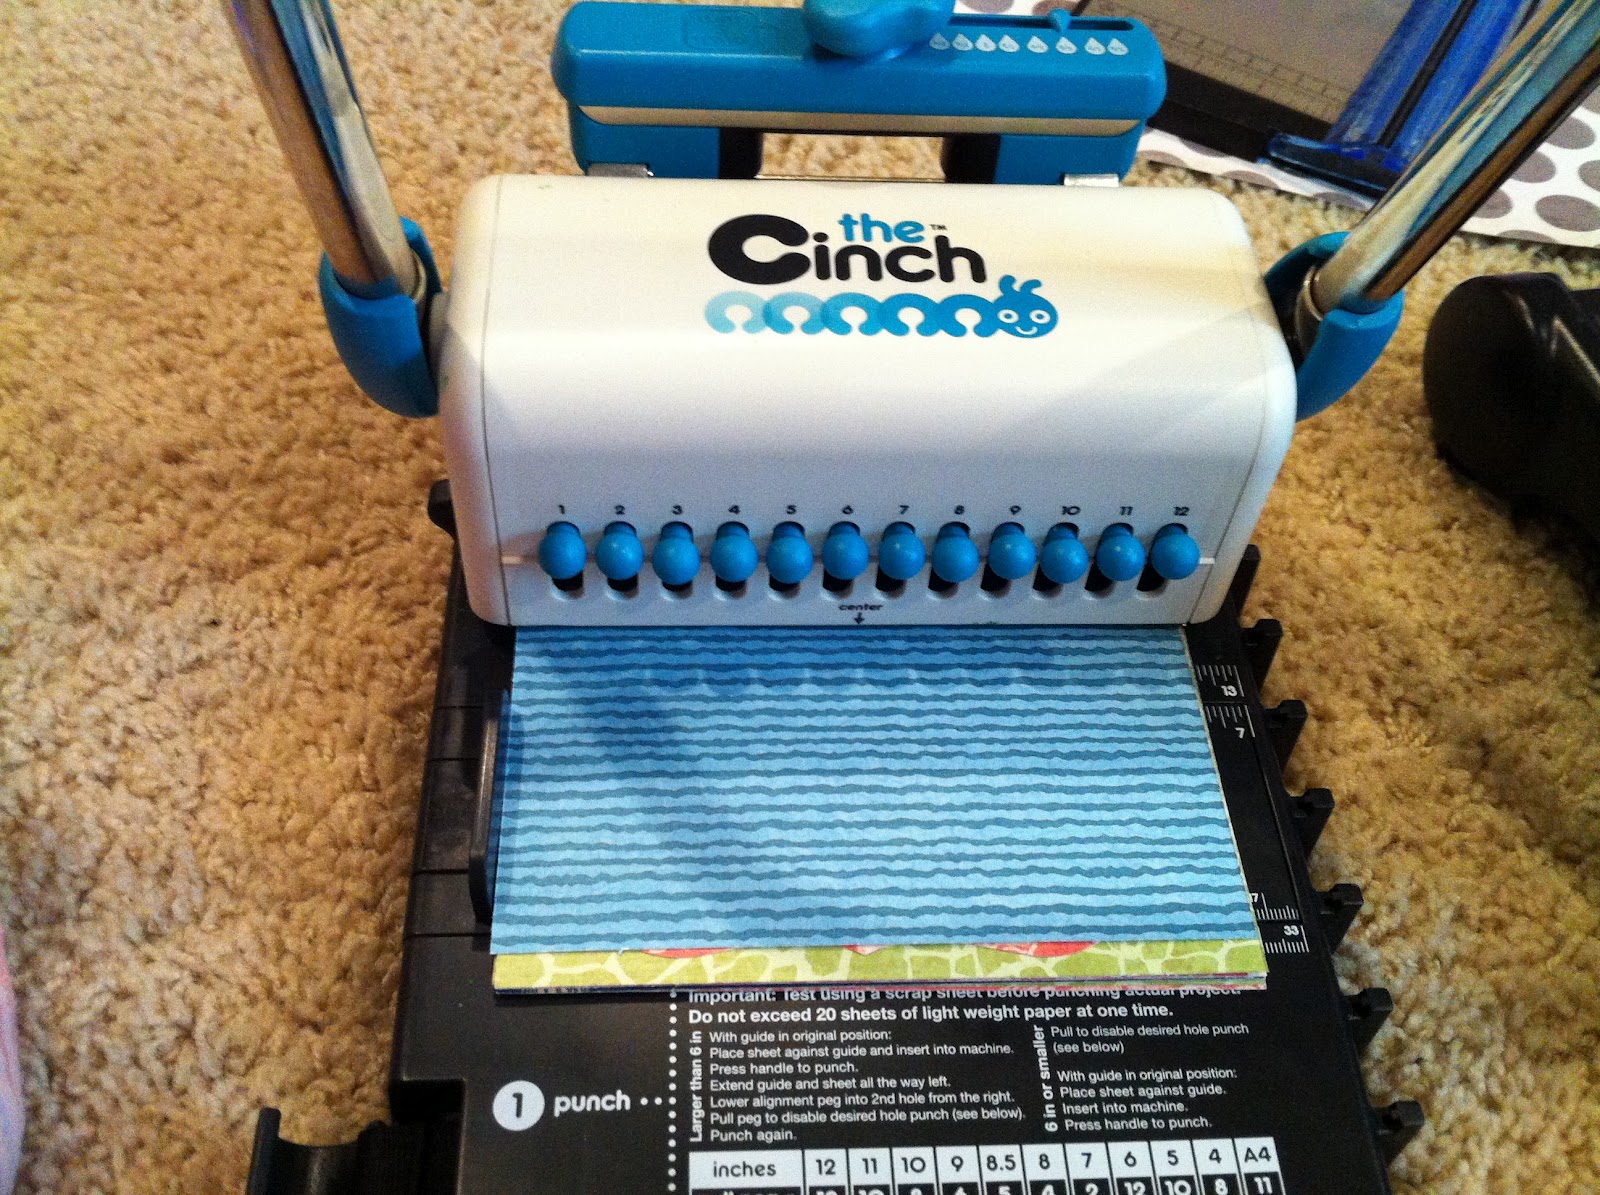
There are many ways you can bind your book - jump rings, ribbon, etc. I wanted to play with a toy I received for Christmas: a book-binding machine. There's a similar machine in the store that you can use whenever you want. Just buy the binding, itself, and have fun playing!
Follow the directions on the machine to bind your book, then add pictures, embellishments, and journalling to truly make the book 'yours.' Here's a look at my finished book and some of the interior pages:


Supplies:
- patterned paper - Graphic45
- clear acrylic
- white acrylic paint
- letter stickers - October Afternoon
- black washi tape
- Cinch binding machine and spiral binding
- Smooch spray mist
- Instax photos
- die-cutter - Big Shot
- scallop die - Spellbinders

Friday, June 1, 2012

Some Heidi Swapp Layouts to Share

I went to Scraphappy last week and was delighted to find the new Heidi Swapp line had come in. I immediately 'claimed' some of the papers and embellishments as mine to play with. Here is what I came up with: The first is what you're used to seeing from me. The second...well, let's just say I've been hanging around a certain other Design Team member/friend a lot lately, and she's rubbed off on me ;)

Supplies:
- patterned paper - Heidi Swapp, My Mind's Eye
- letter stickers - Heidi Swapp (neon), Sassafrass (blue)
- banners, word stickers, epoxy embellishments, label stickers - Heidi Swapp
- date stamp
- Stickles
- brads

Thursday, May 31, 2012

Playing Catch-Up - Recycling on Your Layouts

I don't know about you, but I'm always looking for ways to save money. One of the ways I do this is by reusing items in my home as often as I can, especially in my scrapbooking and memory keeping projects. And I don't know if you knew this, but this coming Saturday is National Scrapbooking Day - a whole day dedicated to this hobby we love. To combine the two interests (recycling and scrapbooking), Christy gave some old books of upholstery fabric swatches to Ashley Horton and me and asked us to make flowers out of them. If you are coming to the store's crop on Saturday, you might find a few of these flowers lying around (hint hint hint)...and if you're not coming, then you'll just have to settle for looking at my pictures here on the blog.

First up: My Supplies...fabric swatches, my BigShot (Any manual die-cutter will work. You just need to adjust the thickness of your cutting pads to account for the fabric and whatever dies you are using), flower or scalloped-circle dies (I used Spellbinders Nestabilities), and brads, stitching, Glubers, or whatever else you want to hold your flowers together (I used brads. Ashley finished others with stitching and other decoration, but you'll have to come to the store Saturday to see hers!)


When you cut your flowers, try to put your dies as close together as possible so you can get several flowers out of a single swatch.

Once you've cut your flowers, take them to your desk and find some supplies and a photo to match (Sorry the photo is sideways. My computer is refusing to rotate my pictures today).
One item I found on my desk is some leftover embellishment packaging. Seriously, how awesome are those acrylic casings that embellishments come in? I save nearly all of them. What can you do with them, you ask? So many, many options. You can stamp on them with staz-on ink (so you can move a stamped image around on your page and not worry about 'messing up' the page). You can die-cut them and make clear embellishments (Anybody remember Heidi Swapp's old Ghost shapes? Now you know how to make your own!). Or you can adhere other embellishments to them to use as a shiny, clear background (like I've done here with some My Mind's Eye embellishments).
And here's how I put it all together. In addition to the fabric flowers and clear packaging (sorry about the glare), I also used the B-side of a product code strip from a piece of patterned paper on this layout. So many recycled bits and pieces on here. Makes me happy.
I hope I've given you some ideas on how to recycle and save some money on your projects. Please feel free to put a link in the comments to any projects you may make using these ideas. And don't forget to enjoy National Scrapbook Day!

Supplies: fabric, Big Shot die-cutter, Spellbinders nestabilities, brown ink
- patterned paper - Dear Lizzy, Studio Calio, Echo Park, Lilly Bee
- letter stickers - Studio Calico
- brads - Bo Bunny
- washi tape - Hambly
- 'jeweled' frame - My Mind's Eye
- butterfly stickers - Studio Calico
- staple - Tim Holtz
- yellow acrylic heart - Heidi Swapp

Wednesday, May 30, 2012

Playing Catch-Up - Playing with New My Mind's Eye

Hello, World!

It's the first Thursday of the month, which means it's time for my regularly-scheduled blog post! I know you've all been waiting with baited breath, right? Lol.Anyhow, I hope everyone has had a chance to check out the new store location. Personally, I love it. It's closer to my house, it's well-stocked, and it's closer to my house (have I mentioned this already?) - which means more opportunities to shop and buy all the new products that are coming in. Remember all those lovely pictures I showed from CHA in January? Well, I have good news for you: the Winter CHA releases are starting to hit store shelves! And ScrapHappy has a lot of it! Yeah for enabling! When I was there last week, I was able to pick up some of the new Basic Grey and Echo Park lines, in addition to some of Rhonna Farrer's lines for My Mind's Eye.

First up, a few layouts for you to look at: Baa Baa Baby Jesus is a layout about my youngest and her friends before they sang in our church's Children's Christmas Program and the sheep song they sang. I wish I could convey the hilarity of their performance. But at least I have this layout to remember it by.

This next layout uses a quote from Dr Seuss. October Afternoon offered the quote as a free Silhouette svg file for easy cutting. I stamped the butterflies with a Jenni Bowlin stamp then layered the quote over it. The people shapes are Studio Calico wood veneers, and the kitty button is from October Afternoon.

And finally, a new magnet board that can be used for everyday messages and note-taking. I cut the days of the week on my Silhouette and inked them with grey ink before Mod-Podging them to the board. The magnets themselves are recycled from my Love Notes magnet board that I showed you at Valentine's Day. All the supplies are available at ScrapHappy.


I hope you've enjoyed the projects today. Let us know if you have any requests or questions.
- Cori