Sunday, June 24, 2012

What Do I Do With That?

Hello, World!
You know those products that you see online or in the store that you absolutely LOVE and that you must have NOW?!! So you buy them. And then you get them home and think, "OK. This is awesome, but what do I do with it?" Well, these die-cut states from Studio Calico fit that description for me. I saw them at CHA and counted the days until ScrapHappy carried them. I'm a traveller. I'm a scrapbooker. You would think this would be easy, right? Sadly, it wasn't. I looked at them and pondered them for ages. I placed them on layouts (without adhesive, of course). I took them off those same layouts. I moved them around...and around...and around...and still they called to me. Until I had a serious BAM! moment, and I realized I didn't have to use them for layouts. I could use them all together as a map puzzle!
First, I had my Kid arrange them on cardstock (I still had hopes of making this a layout, but alas, they wouldn't all fit right on a 12x12 piece of cardstock). Then I decided to use a cork background and put my 'puzzle' in a frame - and you know what? It worked perfectly! After adhering the states to the cork, I added rhinestone stars to each state - bigger stars for where I've lived, and smaller stars for where I've visited. I then enclosed my puzzle background in the frame and added a title to the exterior of the glass with Thickers and Kaiser Craft letter stickers.


Thursday, June 7, 2012

DIY Smashbooks

Hello, Scraphappy Fans!

How many of you know what a 'Smashbook' is? It's this really cool premade album filled with patterned papers that you can take your pictures and everyday-bits-of-life (aka ephemera) and just 'smash' them (or glue them) into. You can make it as organized or random as you want. You can fill it from beginning-to-end. Or you can open to a random page and stick stuff in wherever it makes you happy. The only problem with a premade book like this is that you have no control over what the actual papers are. What you buy is what you get, so I'm going to show you how to make your own. Now you can pick the papers and patterns YOU want inside your book.

First step: Pick your papers. I chose the new summery, tropical-themed papers from Graphic45. Now I don't know about you, but I always think these papers are beautiful to look at, but when it comes to actually USING them, my mind goes blank. Fortunately for me (and now you, since I'm going to share), at CHA the Graphic45 people demo'd how to use their papers in a DIY Smashbook!
In the center of the previous photo, you can see some blue rectangles. Those are clear acrylic sheets that I decided to use for my covers. There's several sizes available at the store, and they are all quite inexpensive. To use the acrylic, just peal off the blue protective film and decorate however you choose. I wanted the edges of my cover to stand out, so I mixed some spray mist with white acrylic paint and painted the edges.
Next, I trimmed my papers to fit in my book. I used several sizes, including some pieces that I die-cut into scallops to add some fun variety.
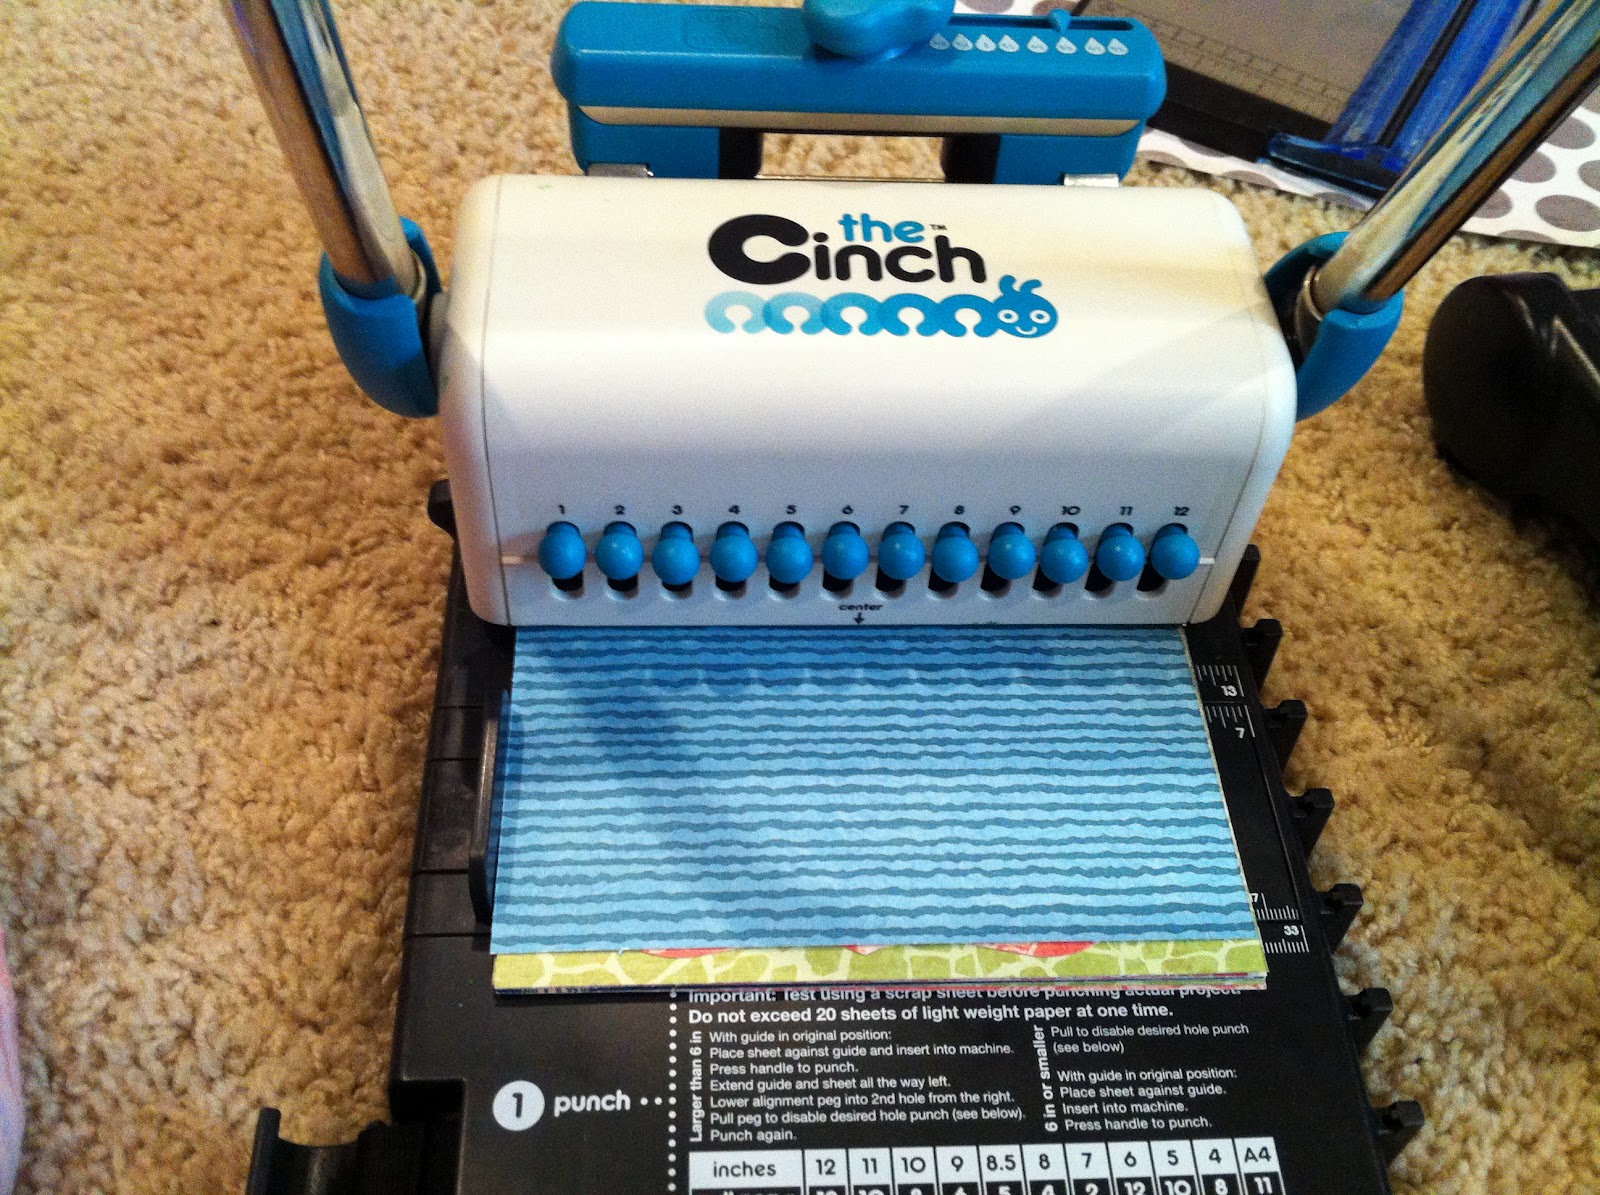
There are many ways you can bind your book - jump rings, ribbon, etc. I wanted to play with a toy I received for Christmas: a book-binding machine. There's a similar machine in the store that you can use whenever you want. Just buy the binding, itself, and have fun playing!
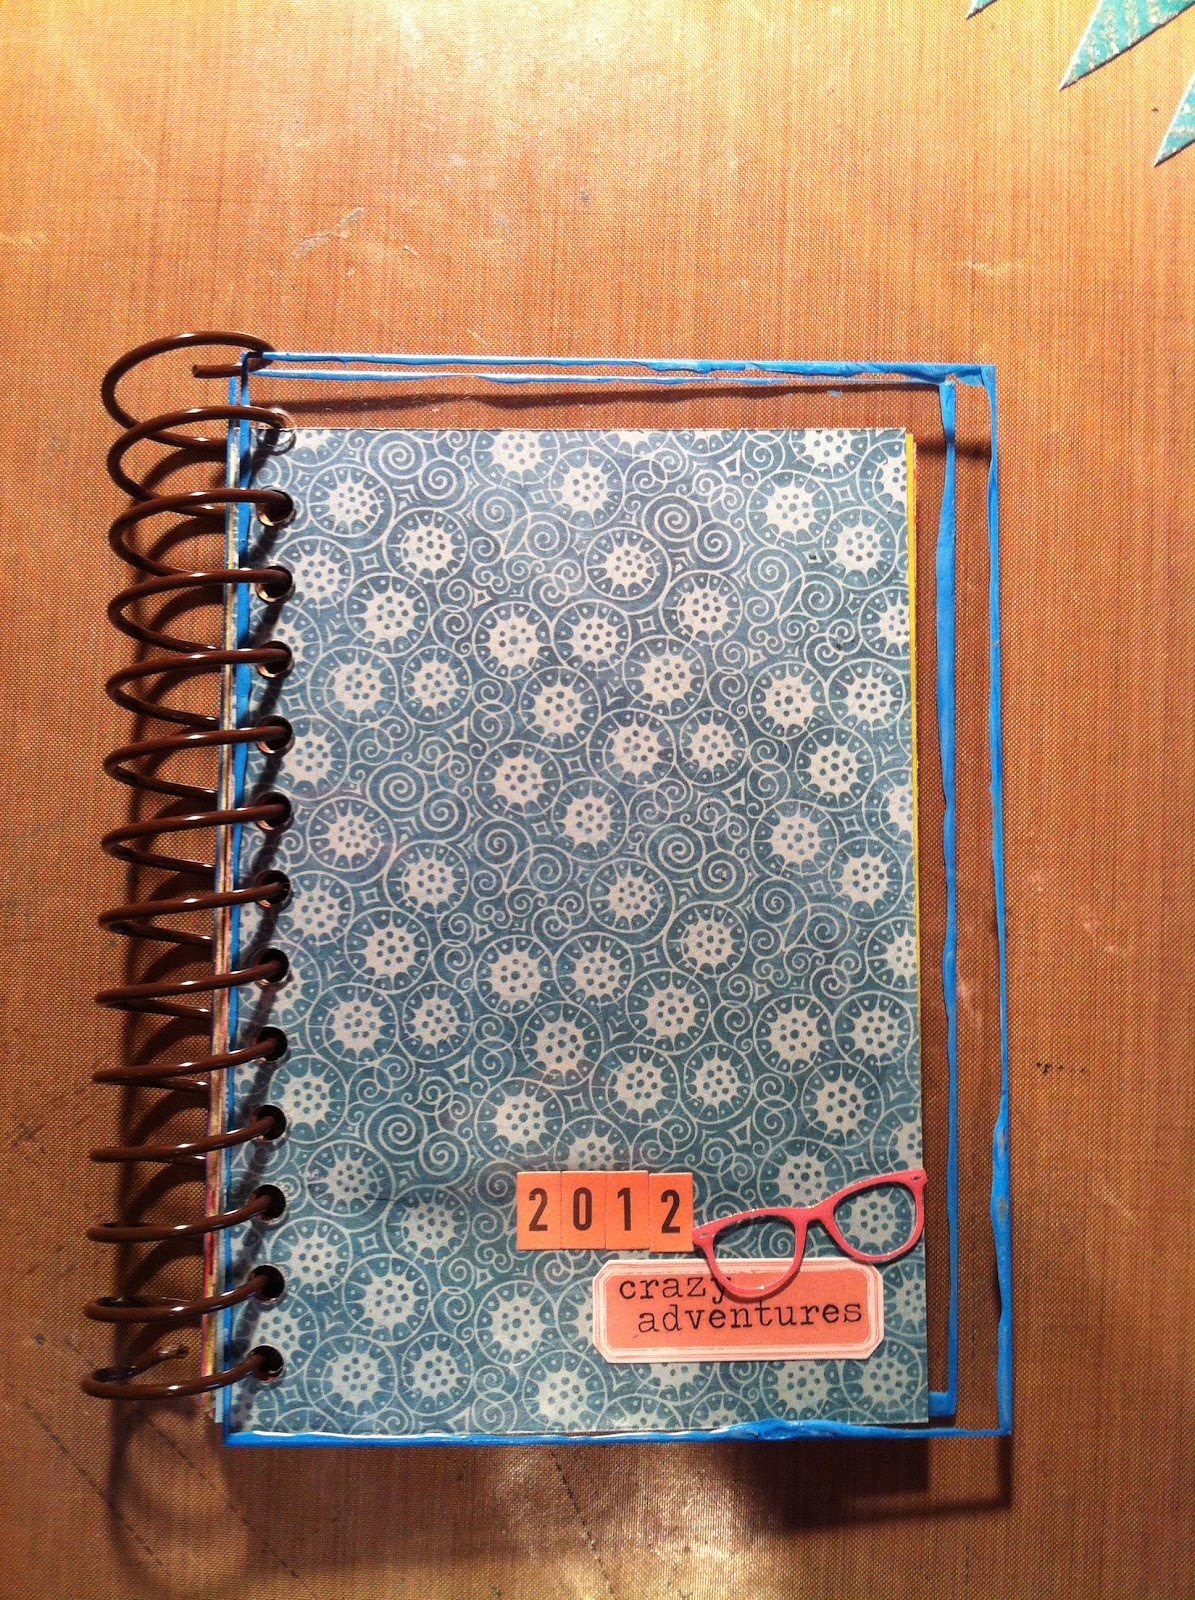
Follow the directions on the machine to bind your book, then add pictures, embellishments, and journalling to truly make the book 'yours.' Here's a look at my finished book and some of the interior pages:


Supplies:
- patterned paper - Graphic45
- clear acrylic
- white acrylic paint
- letter stickers - October Afternoon
- black washi tape
- Cinch binding machine and spiral binding
- Smooch spray mist
- Instax photos
- die-cutter - Big Shot
- scallop die - Spellbinders

Friday, June 1, 2012

Some Heidi Swapp Layouts to Share

I went to Scraphappy last week and was delighted to find the new Heidi Swapp line had come in. I immediately 'claimed' some of the papers and embellishments as mine to play with. Here is what I came up with: The first is what you're used to seeing from me. The second...well, let's just say I've been hanging around a certain other Design Team member/friend a lot lately, and she's rubbed off on me ;)

Supplies:
- patterned paper - Heidi Swapp, My Mind's Eye
- letter stickers - Heidi Swapp (neon), Sassafrass (blue)
- banners, word stickers, epoxy embellishments, label stickers - Heidi Swapp
- date stamp
- Stickles
- brads

Thursday, May 31, 2012

Playing Catch-Up - Recycling on Your Layouts

I don't know about you, but I'm always looking for ways to save money. One of the ways I do this is by reusing items in my home as often as I can, especially in my scrapbooking and memory keeping projects. And I don't know if you knew this, but this coming Saturday is National Scrapbooking Day - a whole day dedicated to this hobby we love. To combine the two interests (recycling and scrapbooking), Christy gave some old books of upholstery fabric swatches to Ashley Horton and me and asked us to make flowers out of them. If you are coming to the store's crop on Saturday, you might find a few of these flowers lying around (hint hint hint)...and if you're not coming, then you'll just have to settle for looking at my pictures here on the blog.

First up: My Supplies...fabric swatches, my BigShot (Any manual die-cutter will work. You just need to adjust the thickness of your cutting pads to account for the fabric and whatever dies you are using), flower or scalloped-circle dies (I used Spellbinders Nestabilities), and brads, stitching, Glubers, or whatever else you want to hold your flowers together (I used brads. Ashley finished others with stitching and other decoration, but you'll have to come to the store Saturday to see hers!)


When you cut your flowers, try to put your dies as close together as possible so you can get several flowers out of a single swatch.

Once you've cut your flowers, take them to your desk and find some supplies and a photo to match (Sorry the photo is sideways. My computer is refusing to rotate my pictures today).
One item I found on my desk is some leftover embellishment packaging. Seriously, how awesome are those acrylic casings that embellishments come in? I save nearly all of them. What can you do with them, you ask? So many, many options. You can stamp on them with staz-on ink (so you can move a stamped image around on your page and not worry about 'messing up' the page). You can die-cut them and make clear embellishments (Anybody remember Heidi Swapp's old Ghost shapes? Now you know how to make your own!). Or you can adhere other embellishments to them to use as a shiny, clear background (like I've done here with some My Mind's Eye embellishments).
And here's how I put it all together. In addition to the fabric flowers and clear packaging (sorry about the glare), I also used the B-side of a product code strip from a piece of patterned paper on this layout. So many recycled bits and pieces on here. Makes me happy.
I hope I've given you some ideas on how to recycle and save some money on your projects. Please feel free to put a link in the comments to any projects you may make using these ideas. And don't forget to enjoy National Scrapbook Day!

Supplies: fabric, Big Shot die-cutter, Spellbinders nestabilities, brown ink
- patterned paper - Dear Lizzy, Studio Calio, Echo Park, Lilly Bee
- letter stickers - Studio Calico
- brads - Bo Bunny
- washi tape - Hambly
- 'jeweled' frame - My Mind's Eye
- butterfly stickers - Studio Calico
- staple - Tim Holtz
- yellow acrylic heart - Heidi Swapp

Wednesday, May 30, 2012

Playing Catch-Up - Playing with New My Mind's Eye

Hello, World!

It's the first Thursday of the month, which means it's time for my regularly-scheduled blog post! I know you've all been waiting with baited breath, right? Lol.Anyhow, I hope everyone has had a chance to check out the new store location. Personally, I love it. It's closer to my house, it's well-stocked, and it's closer to my house (have I mentioned this already?) - which means more opportunities to shop and buy all the new products that are coming in. Remember all those lovely pictures I showed from CHA in January? Well, I have good news for you: the Winter CHA releases are starting to hit store shelves! And ScrapHappy has a lot of it! Yeah for enabling! When I was there last week, I was able to pick up some of the new Basic Grey and Echo Park lines, in addition to some of Rhonna Farrer's lines for My Mind's Eye.

First up, a few layouts for you to look at: Baa Baa Baby Jesus is a layout about my youngest and her friends before they sang in our church's Children's Christmas Program and the sheep song they sang. I wish I could convey the hilarity of their performance. But at least I have this layout to remember it by.

This next layout uses a quote from Dr Seuss. October Afternoon offered the quote as a free Silhouette svg file for easy cutting. I stamped the butterflies with a Jenni Bowlin stamp then layered the quote over it. The people shapes are Studio Calico wood veneers, and the kitty button is from October Afternoon.

And finally, a new magnet board that can be used for everyday messages and note-taking. I cut the days of the week on my Silhouette and inked them with grey ink before Mod-Podging them to the board. The magnets themselves are recycled from my Love Notes magnet board that I showed you at Valentine's Day. All the supplies are available at ScrapHappy.


I hope you've enjoyed the projects today. Let us know if you have any requests or questions.
- Cori

Wednesday, February 29, 2012

A Few Layouts

Hello World!

In case you haven't heard, Scraphappy is moving! Yesterday was the last day at their location on Airport. The store will reopen next week on March 5 at its new location. The new address is:

7841 Pine Forest Road
Pensacola, Florida

Christy had a massive pre-moving sale, so be prepared to come to the new store and find lots of new items coming in. All those gorgeous new releases from CHA? Well, most of them start shipping within the next few weeks, and Christy has put in a nice, big order. So exciting! Fortunately for all of us Scrapbook Addicts, New Stuff started arriving last week before the move, so you only have to wait until the store reopens to get your Supply Fix. And to entice you further, I'm going to show you a few layouts I made using some of the new Miss Caroline line from My Mind's Eye.

Before you look at these layouts, you should know that my youngest is a Mardi Gras Baby. She is fully convinced that Mardi Gras parades are in her honor. When asked what she wanted to do for her birthday, she proudly announced that she wanted to go a parade and "get more stuff." And she wanted to go with her friends...hence the title and journalling on this first page, as well as the subject matter of my layouts.

(Supplies: patterned papers, rub-ons, and cardstock stickers - My Mind's Eye; letter stickers - October Afternoon; Stickles; brads)

(Supplies:patterned papers and rub-ons - My Mind's Eye; butterfly die - Tim Holtz Sizzix; brown ink, alphabet stamps, and staples)

(Supplies: cardstock - American Crafts; patterned paper, die cut, cardstock stickers, and rub-ons - My Mind's Eye; notebook punch; brads, grey ink)
Hope to see you in the new store!
- Cori

Thursday, January 5, 2012

Time for Tissue Paper

Happy New Year, Everyone! I hope you all had a very Merry Christmas and a safe New Year's. With all this extra time off from work, I hope you had a chance to play with your photos, paper, and glue!

If you need of some inspiration to jumpstart your creativity, I would like to show you a few projects I have made recently with Tim Holtz's new tissue paper rolls. These rolls come in a variety of patterns, including text and music notes, and are a heavier-weight tissue paper than you typically find to wrap presents with - almost as substantial as a light vellum. The rolls contain several yards of paper, so this is a good supply to split with your friends (hint, hint, hint).

First of all, a few layouts. On the first, Rebuilding Ground Zero, I used the tissue paper as part of my background, reminiscent of newsprint. I layered bits and pieces of Coredinations Kraft Core cardstock and scraps from my desk to complete the layout.

On this second layout, She Thinks It Is Called the Mountain of Rushmores, I used a piece torn from the roll as a mat for my title and journalling. You can see how well it layers over patterned papers to subtley mute their brightness.
                                              
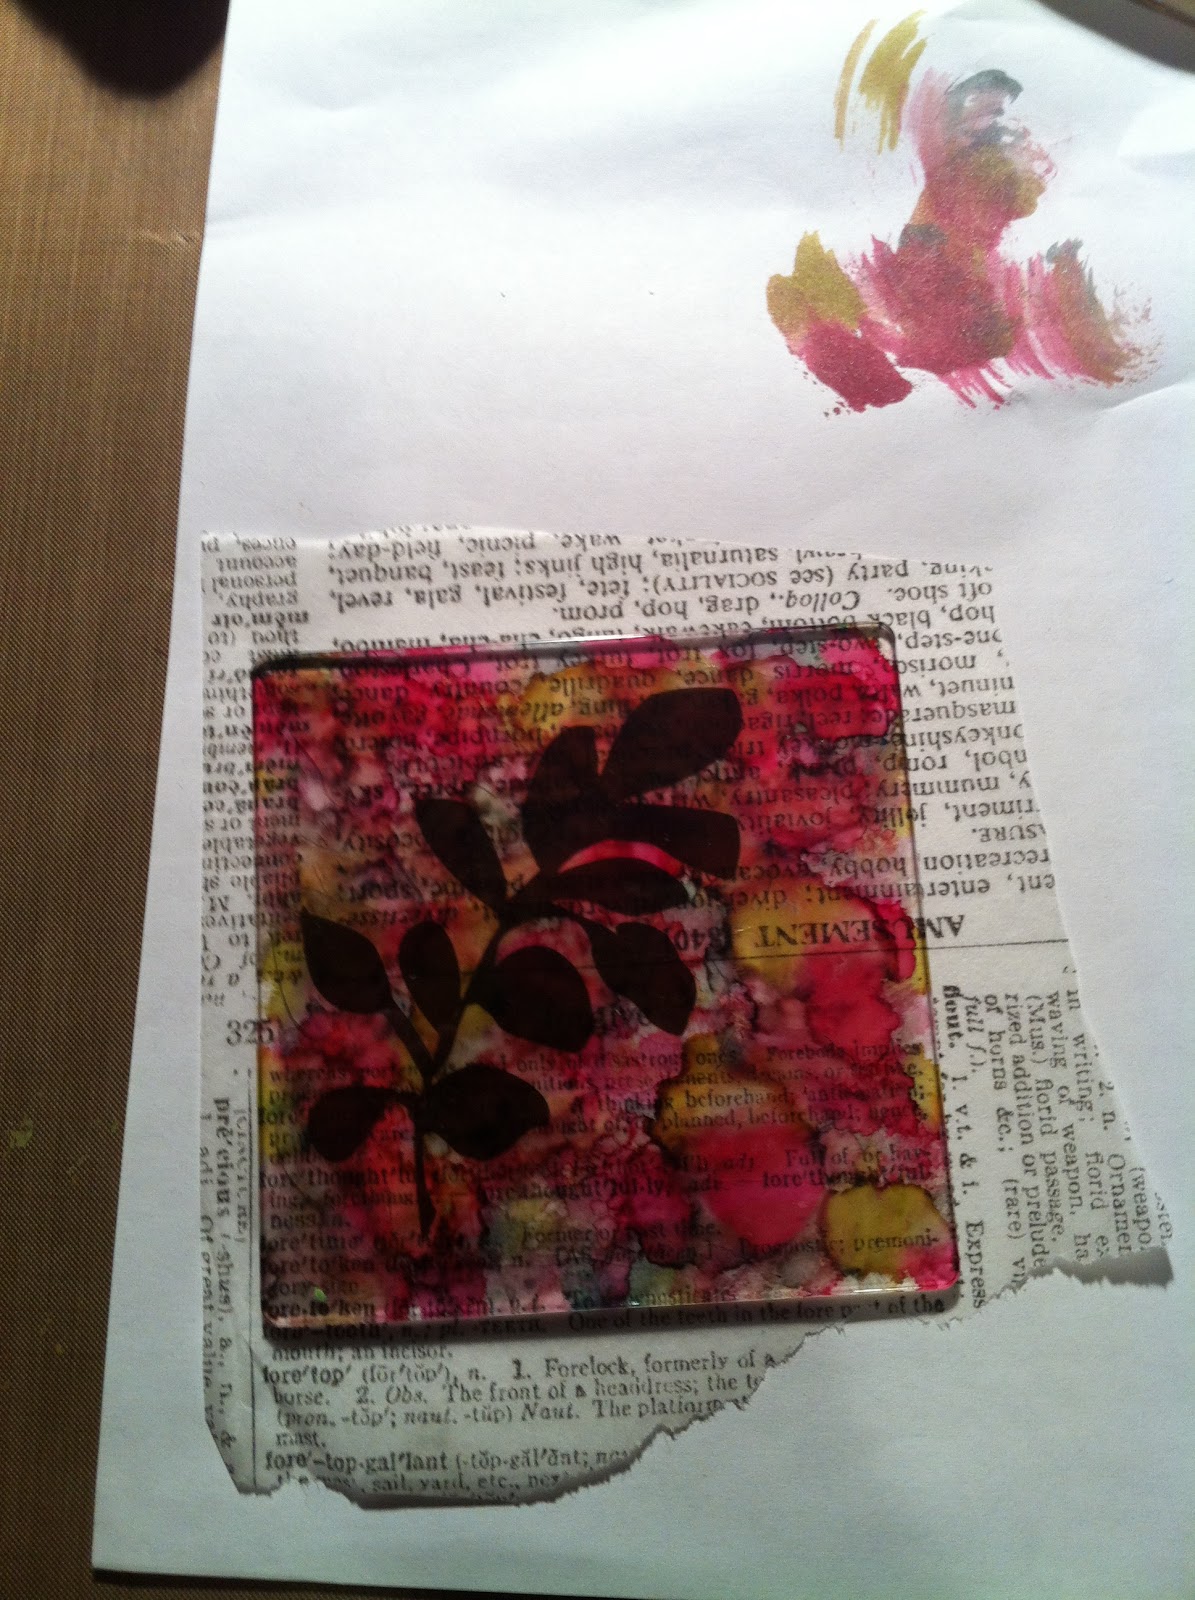
After making a few layouts, I decided I needed some messy playtime. I pulled out my alcohol inks, a square piece of acrylic (You can find several different pre-cut sizes in the store. Perfect for ornaments, mini-book covers, etc), some modpodge, my tissue paper, and some random embellishments.
First, I dabbed some alcohol ink over my acrylic block to give it some color (I used Christmas colors since I was making an ornament).
Next, I dabbed some Adirondack Alcohol Blending Solution over the block. Can you see the subtle difference between the 2 photos? In the one below, the blending solution has 'pushed' the ink around, giving it a fun splotchy look.
The alcohol ink dries quickly, so I didn't have to wait to modpodge some of the Tim Holtz tissue paper to the back of my acrylic block. I sandwiched the (very old) brown leafy embellishment between the acrylic and the tissue paper when I did my modpodging.
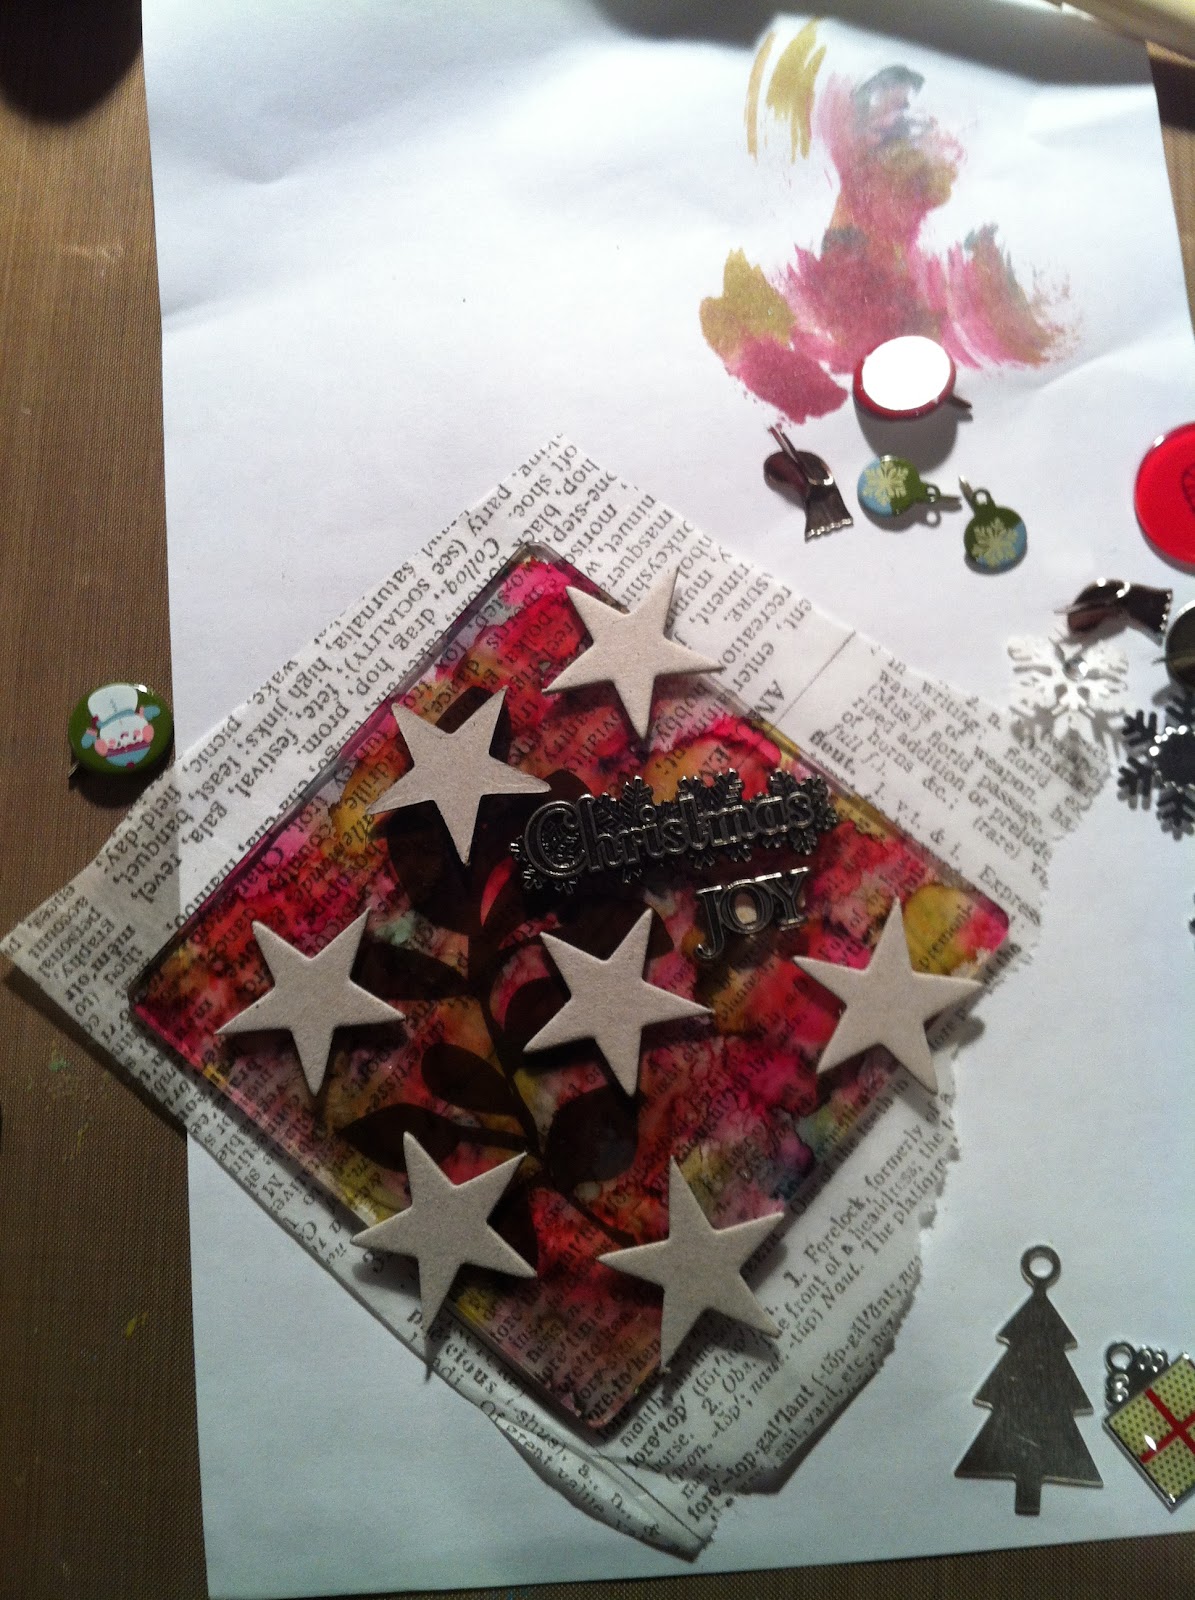
Once the modpodge glue had dried, I decorated the front of my ornament with some metal Christmas words I had in my stash, as well as some layered poinsettia flowers that I had rubbed with Stickles.

I used my Crop-o-dile to punch a hole in the top corner, tied a ribbon, and hung the ornament on our tree at ScrapHappy.
And finally, I don't know about you, but I often wrap gifts with tissue paper. I was curious to see how well the tissue paper absorbed ink, so I used my Tim Holtz Distress Stain (fired brick) to colorize some of the tissue paper. I also used the stain to coordinate the ribbon, and then I wrapped a faux-gift to put under my mini-tree next year. The tag is my first attempt at Tim Holtz's 12 Tags of Christmas. I tied it to the top to make my 'gift' look pretty :)
I hope I've given you some ideas to stimulate your creativity. Until next month, have fun making creative messes, and come see us in the store! Many of us will be heading to the Craft and Hobby Association Trade Show later this month. If there's any companies or booths you want us to check out and post peaks of, let me know!